
Tutorial THURSDAY! Whole Wheat Flax Bread
11:15 AM

Even though I am going gluten free for Lent, I needed to share this recipe for my Tutorial Tuesday..I mean THURSDAY! I had wanted to make my own whole wheat bread last week to eat with the following day's dinner, but I am not a fan of having to sit and wait...and wait...and wait for my breads to rise. I also wanted to make some whole wheat bread since I had a large opened bag that I needed to start using up and we had been eating so much of the white stuff the past week. I went online and found the 5 Minute Flax Wheat Bread Recipe from momdish.com and decided to give it a try.
At first I didn't realize that you needed to let it rise overnight and began whisking away to gather ingredients just before dinner, but in the end I was glad I could mix up the ingredients and not have to do anything else until the next day. Busy, busy me!
The ingredients are super simple:
- 3 cups
Whole Wheat Flour
2 teaspoons Yeast
1 teaspoon Salt
1 cup Ground Flax Seed
1 1/2 cups Luke Warm Water
- Mix dry ingredients. Mix in water a little at a time. Fold it all in with your hands and place in a bowl covered with plastic wrap overnight.
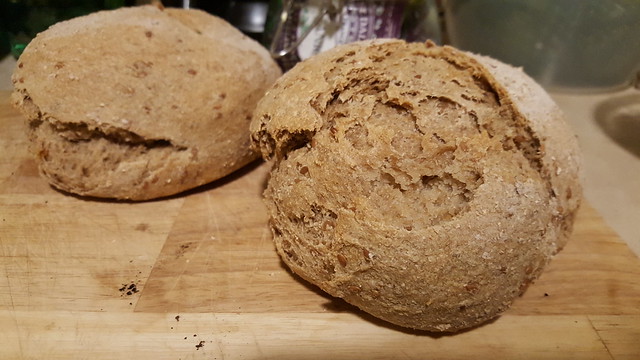
- The next day your bread should be bubbly and sticky. At this point you can either split into two loaves or leave as one. We decided to split the loaves, which was a good idea since it is very hearty and filling. Place your loaf (or loaves) on a floured baking sheet, cover with a dish towel, and let rise another hour before baking. Although the recipe doesn't specify that you must, we rolled ours out a little on a floured surface before hand (well, actually my hubby did it since I was still at the gym).
-
Preheat the oven to 450F. Pour 2 cups of hot, boiled water into a deep cooking sheet. Place this cooking sheet on a lower level, inside your oven. (This will make the bread crispy and make it rise more). Place the bread on the top level on a separate baking sheet. Remove water from the oven after 10 minutes. Keep on baking bread for another 20-30 minutes (depending on the size of the bread).
Thank you again to momdish.com for sharing this recipe.
This blog was also published at MomBloggersClub and BlogLovin'.
This post contains affiliate links. I was neither paid nor received any other compensation to endorse the products contained in this post. All opinions expressed herein are my own and all photos are my own with applicable copyrights retained.


0 comments