halloween costumes - part I - handmade narnia themed knight
10:50 AM
Pintrest, Pinterest, Pinterest! What did we ever do without Pintrest?!
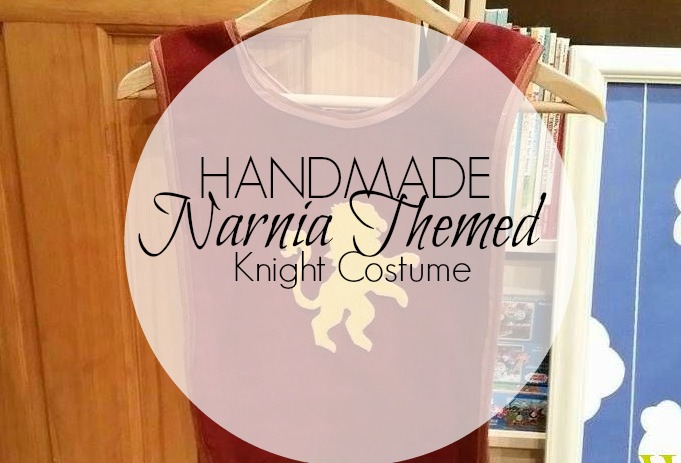
I love searching Pinterest for ideas for almost everything, so when I needed to find some costume ideas for E I got the browsing. I found this blog post online for a Narnia inspired birthday accompanied by an adorable knight costume. The next day I hit the fabric store and grabbed some velvety-maroon fabric, some grey yarn, and felt (along with some other things for myself) and crossed my fingers. I couldn't wait to have a go. Although Eamon has never actually seen Narnia, both of his parents are big fans.
Here it goes!
The construction of the vest was quite easy to make but still took some time since little one would not allow me to measure him properly! After some squirming I decided it was much easier to simply grab one of his shirts and measure from there. I began with half a yard of fabric which I ironed some straight seams for the sides and applied fray block (don't worry, it does not stain, despite what the photo may look like). Although this wasn't a necessary step, I noticed that the fabric ends frayed easily so I found no harm in it. Next, I applied some black fusible interfacing (found HERE, however I purchased on fabric row here in Philly) to the back of the "smock" to eliminate having to sew a backing on it, especially since the fabric was already thick enough. The color of the interface makes it look clean and polished without adding any extra sewing steps.
For the neck I used a t-shirt to draw out a circle from the center, making sure it was large enough to pull over. After, I sewed on some matching bias tape (aka the devil!) to the collar and sides, but chose some gold fringe for the bottom just like the blog showed. I applied the bottom with fabric glue and allowed to dry overnight before I ironed the piece to get it ready for the applique. A piece of gold felt and a lion stencil (found HERE ON PINTEREST) finished up the vest. I applied this with a little tacky glue as well. Not exactly the cheapest costume, but nonetheless adorable, and I was able to buy a lot of the pieces from local shops.


Eamon didn't quite understand the vest but did like the fact that it had a gold lion, or as he called it, the Lion of Sodor (he is a huge Thomas the Tank Engine fan). Since he wasn't familiar with Narnia yet we keep telling him he is going to be a Knight of Sodor for Halloween.
Supplies & Cost:
Here's a quick recap on what was used...
- 1/2 yard poly/velvet blend fabric: $7.49- black fusible interfacing: no cost, part of my stash!
- gold felt: $.49
- 1 pack maroon bias tape: $2.49
- fringe: $3.95
- thread: on hand
Although the original post uses a ribbon tie to secure the piece, I used some glue-on velcro since E is so small and I didn't want the tie to cover up the design on the front.
Check back to see the progress on the rest of the costume along with some tutorial and how-to guides.








0 comments